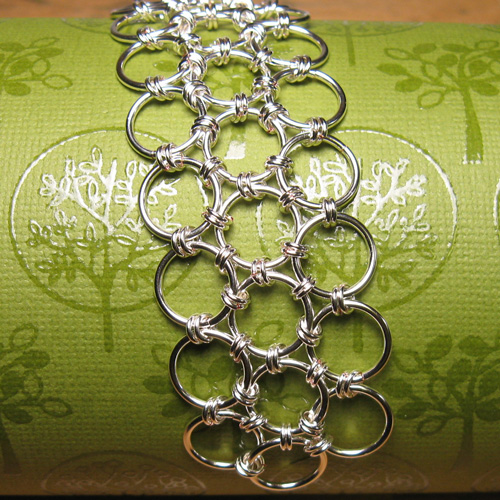
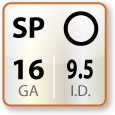
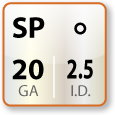
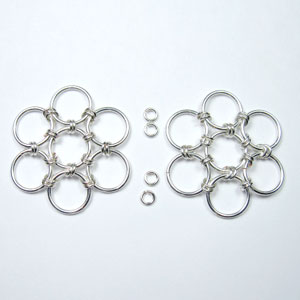
Japanese 6 in 1 - A great project with lots a flexibility in rings sizes. In this example we are using 16ga 9.5mm I.D. for the large rings and 20ga 2.5mm ID small rings. Six-in-One is defined by 6 rings connected to one main ring. I am doubling up the 20ga 2.5mm rings for style.
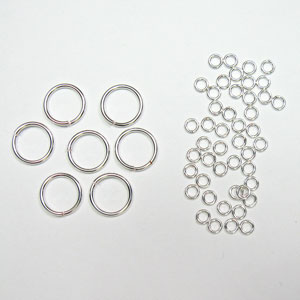
This project uses the following size jump rings.
|
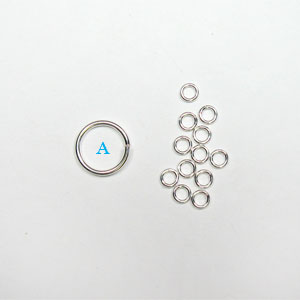
STEP 1: Flower We are going to start this project making a series of flowers, then link the flowers together in several different patters. We will be using 16ga 9.5mm ID Jump Rings - LARGE and 20ga 2.5mm ID - SMALL Close all of the small rings. |
 |
||
|
STEP 2: Build a Flower Open (1) large 16ga 9.5mm ID jump ring A and add (12) 20ga 2.5mm ID jump rings [you closed them all first, right?] Note: This is the 6-in-1 pattern, but we are doubling up the small rings for style, therefore there are (12) rings attached instead of (6). |
 |
||
|
STEP 3: Center of the Flower |
 |
||
|
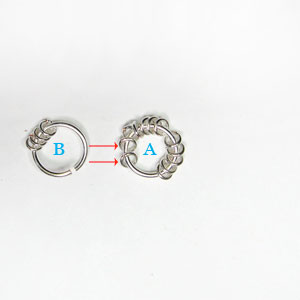
STEP 4: Open First Flower Petal (close 4 more small rings) Open a new large ring B and add (4) small rings |
 |
||
|
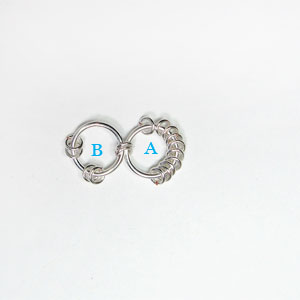
STEP 5: Attach First Petal While the new large ring B is still open, insert the ring thru (2) existing small rings of the center ring A. |
 |
||
|
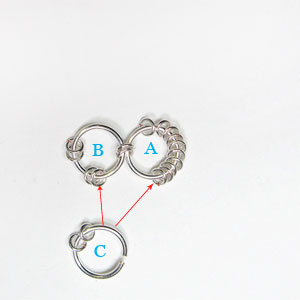
STEP 6: Open Second Petal (close 2 small jump rings) Open a new large ring C and add (2) small rings |
 |
||
|
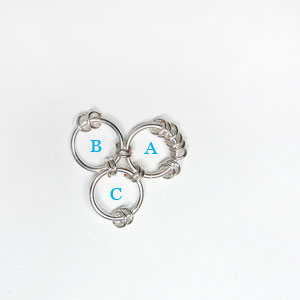
STEP 7: Attach Second Petal While the new large ring C is still open, insert the ring thru (2) existing small rings on ring B and thru (2) existing small rings on center ring A |
 |
||
|
STEP 8: Open Third Petal (close 2 small jump rings) Open a new large ring D and add (2) small rings |
 |
||
|
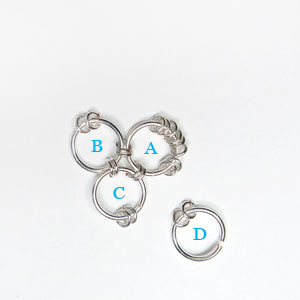
STEP 9: Attach Third Petal While the new large ring D is still open, insert the ring thru (2) small rings on ring C and thru (2) small rings on center ring A |
 |
||
|
STEP 10: Open Fourth Petal (close 2 small jump rings) Open a new large ring E and add (2) small rings |
 |
||
|
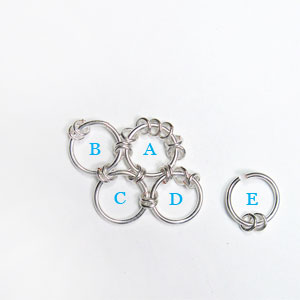
STEP 11: Attach Fourth Petal While the new large ring E is still open, insert the ring thru (2) small rings on ring D and thru (2) small rings on center ring A |
 |
||
|
STEP 12: Open Fifth Petal (close 2 small jump rings) Open a new large ring F and add (2) small rings |
 |
||
|
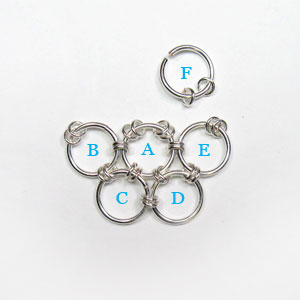
STEP 13: Attach Fifth Petal While the new large ring F is still open, insert the ring thru (2) small rings on ring E and thru (2) small rings on center ring A |
 |
||
|
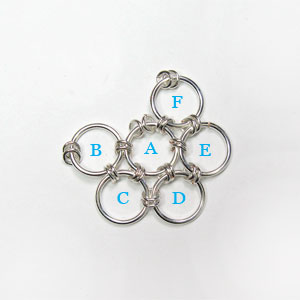
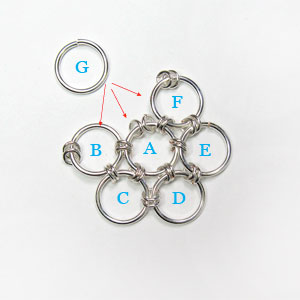
STEP 14: Open Sixth (final) Petal Open a new large ring G - no rings are added |
 |
||
|
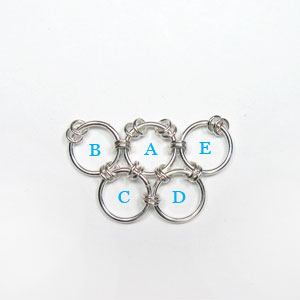
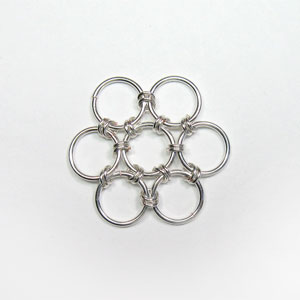
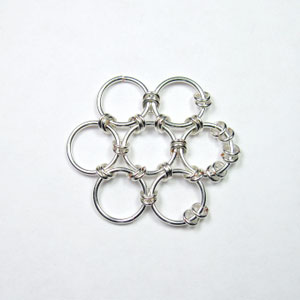
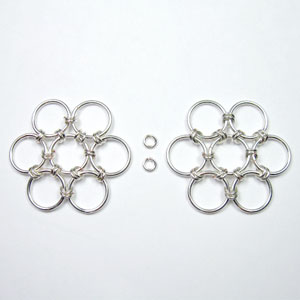
STEP 15: Attach Sixth Petal While the new large ring G is still open, insert the ring thru (2) small rings on ring F then thru (2) small rings on center ring A, then thru two rings on ring B. Congratulations, you have a 6-in-1 flower! |
 |
||
|
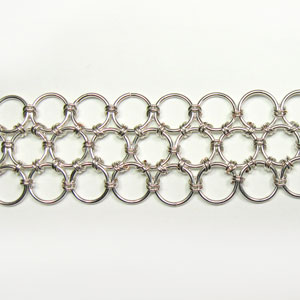
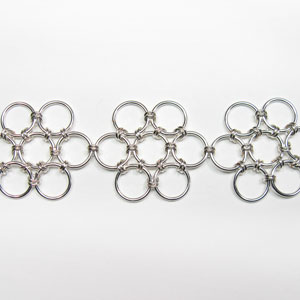
STANDARD CHAIN There are several variations to build this chain. |
 |
||
|
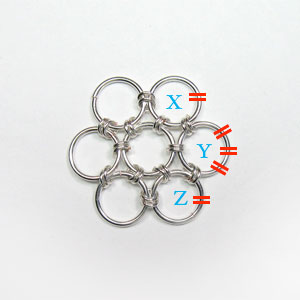
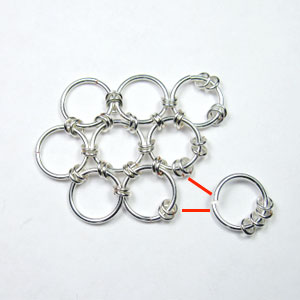
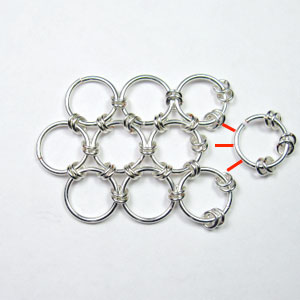
STEP 16: Adding Petals For speed weaving: close another (24) small jump rings. Re-open the the large jump rings labeled X, Y & Z, on the outer edge and add the jump rings as shown. X = add 2 small rings Y = add 6 small rings Z = add 2 small rings |
 |
||
|
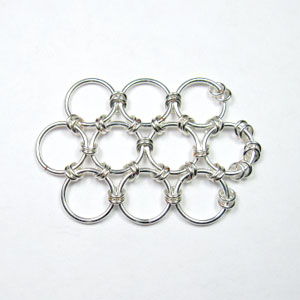
Ready to Build the Chain Your chain should look like this. |
 |
||
|
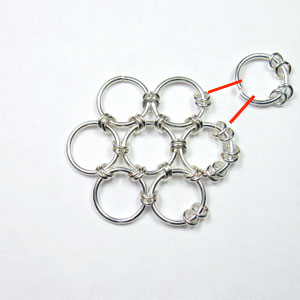
STEP 17: Attach Top Petal Open a new large ring and add (4) small rings. Attach the ring to the existing small rings. |
 |
||
|
STEP 18: Attach Bottom Petal Open a new large ring and add (4) small rings. Attach the ring to the existing small rings.
|
 |
||
|
STEP 19: Attach Middle Petal Open a new large ring and add (6) small rings. Attach the ring to the existing small rings. |
 |
||
|
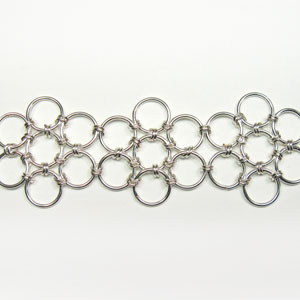
STEP 20: Continue the Chain Repeat steps 17, 18 & 19 until you reach desired length. |
 |
||
|
Creat flowers as show in Steps 1 thru 15 |
 |
||
|
Linking Flowers Link the flowers in areas shown |
 |
||
|
Creat flowers as show in Steps 1 thru 15 |
 |
||
|
Linking Flowers |
 |
||