Make your own Heirloom Ornament
The Bead Man offers four sizes of wire snowflake ornament frames. Our signature frame, the 9" wire frame is great for ornaments, sun catchers, window decorations. Each size made of 19 gauge tempered steel and fits most glass beads.
Snowflake Designs
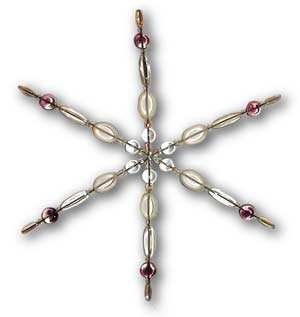
Basic Design: "The Empress"
Any one can make a great snowflake. You might have seen this style in Martha Stewart Magazine.
Start with one wire or spoke. Create your design by placing beads on the wire until your reach the desired length. Trim the excess wire leaving 1/2" at the end and make a loop using a pliers. This will keep the beads in place and give you a hook to hang your snowflake.
Repeat the identical pattern on each spoke, looping each end. It is that easy. Note: If you bead gets caught midway, the spoke may have a slight bend in it. Remove the bead, straighten the wire with a pliers
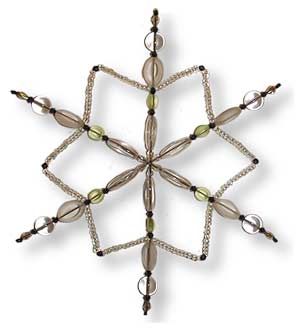 Advanced Design: "The Maze"
Complete your snowflake design as show above in the Basic Design.

Cut a three foot length of 24 gauge craft wire. Secure one end of the wire between two beads on a spoke.
Thread small seed beads (size #6) on the wire until you reach the same spot on the neighboring spoke. Wrap the wire once around the spoke and repeat this process using the same number of beads between each spoke.
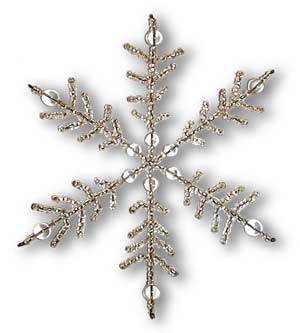
Snowflake Branches: "Crystal Palace"
Each branch is made separately using #6 seed beads and 28 gauge wire
1. Cut a 3 foot length of wire. Tape 6 " from one end to prevent the beads from falling off the end of the wire. String on 4 beads; this will be the space between branches.
2. Add 4 beads to create the first "branch".
3. Skip bead #4 and thread back thru beads 3-2-1.
4. Add 4 more beads to create the opposing "branch". Skip bead #4 and thread back thru beads 3-2-1
5. Add 4 "spacer" beads and repeat steps 2 thru 4, adding 1 extra bead to the length of each set of branches.
6. Carefully slide the entire set of branches on to a spoke and wrap the ends of the wires around the spoke to secure.
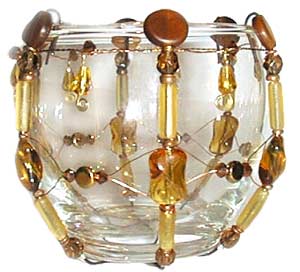 Votive Candle Holder - Example Uses 9" Frame
1. Place votive holder face down on your work surface. Hold frame firmly on the center of the votive base. Mark where the frame meets the bottom edge of the votive. Using a chain nose plier, bend the frame at those marked points.
2. Place a crimp bead 1/4" past the bend. This will prevent the beads from moving under the votive holder.
3. Thread beads in a pattern on each spoke until you are even with the lip of the glass. Bend the remainder of the spoke into the inside of the votive glass to secure the frame.
4. Attach a length of 28g wire to a spoke; add a few beads and wrap round the neighboring spoke.
5. Finish by bending the ends of the spokes over the edge and into the inside of the votive. (use plier)
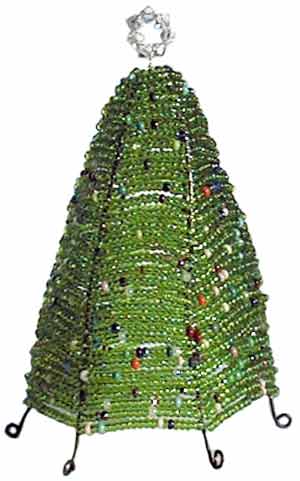
Christmas Tree - Uses 9" Frame
IMPORTANT: When bending the frames near the weld joint, you must first wrap the joint tightly with approx. 1 foot of 28 gauge craft wire.
1. Hold frame joint firmly on the center of a 1/2" dowel (a magic marker works well). Bend each spoke with a chain nose plier where the wire meets the edge of the dowel to form a cone. (tree shape).
2. String small seed beads on 28 gauge craft wire. If you use #10 seed beads you will need to string approx. 12 feet. It will make your work easier if you keep the wire on the spool.
3. Starting at the top of the tree, attach the beaded wire to the joint. Wrap the beaded wire around the tree form. Loop the wire around each spoke as you go. A good rule of thumb (when using #10 seed beads) is to increase the number of beads that span each spoke by 1 every other row.

Drop Ornament - Uses 9" Frame
IMPORTANT: When bending the frames near the weld joint, you must first wrap the joint tightly with approx. 1 foot of 28 gauge craft wire.
1. To center weld from breaking, use a ring bending or bracelet bending pliers. This will allow your to create a gentle arc. A golf ball placed in the center can help guide a proper curve.
2. Add beads to each spoke to create your design. Longer beads will not fit on the curved wire. Short or round beads are your best choice for the curved portion.
3. Trim spoke with wire cutter 1/2" from the top of the last bead. Using a round nose pliers, make a loop at each end.
4. Draw all looped ends together and bind them with craft wire.
5. OPTIONAL. This ornament looks terrific with a beaded tassel. String 3 strands of beads on wire or thread and connect to the bottom of the ornament.