Time to Complete: ~2 hours
Final Length: Customizable
2 pairs of pliers
Awl
Clasp of your choice
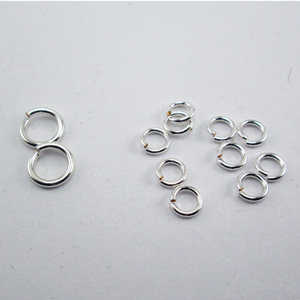
16ga 5.5mm ID - 5 per inch
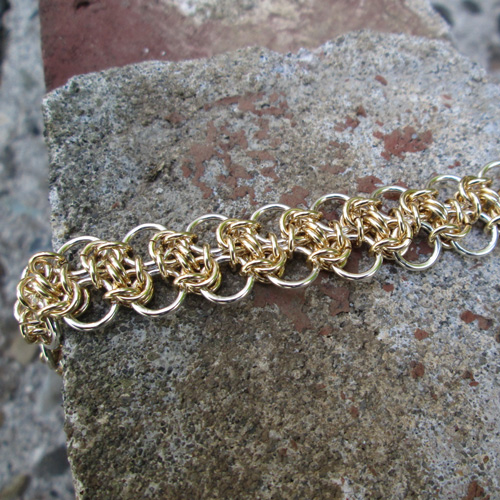
MATERIALS
This project uses SMALL jump ring (18ga 3.75mm ID) and LARGE jump rings (16ga 5.5mm ID)
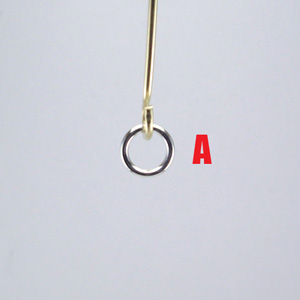
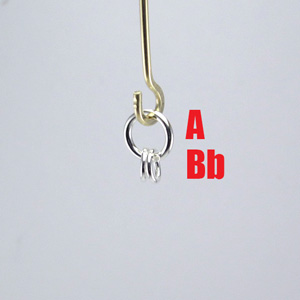
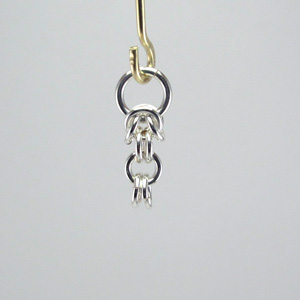
STEP 1: The Starter
Close a large (16ga 5.5mm ID) jump ring [A]. I recommend attaching a piece of scrap wire to help hold on to your project.
STEP 2: Add a Small Ring
Attach a new small (18ga 3.75mm ID) jump ring [B] to jump ring [A].
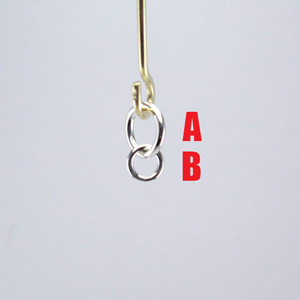
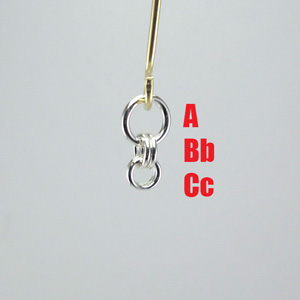
STEP 3: Add a Second Ring
Attach a second small jump ring [b] to jump ring [A].
STEP 4: Add New Ring C
Add a new small jump ring [C] and attach it to both rings [B & b]

STEP 5: Add New Ring c
Add a new small jump ring [c] and attach it to both rings [B & b]
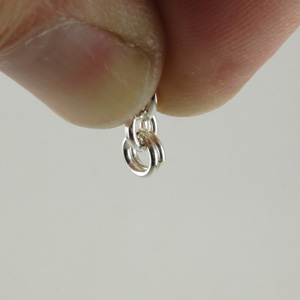
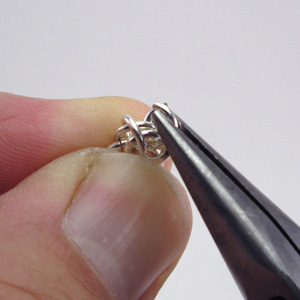
STEP 6: The Grip
Hold the starter ring [A] by the wire and let the jump rings hang. Use your thumb and finger so that you pinch [A & Bb]. This isolation technique will make it easier to build your chain. If you wiggle your hand, only pair [Cc] should move back and forth.
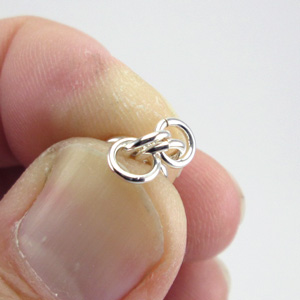
STEP 7: The Flip
Turn your hand so that you are pointing the starter at the ceiling. ([Cc] is now on top). Separate rings [C] and [c] to open like the petals of a flower.
STEP 8: The Separation
Using an Awl or pointed tool, separate the rings [B] and [b]. If you lose your place start over (step 6: the grip) and focus on pinching rings [A] [Bb] to keep the rings from moving too much.
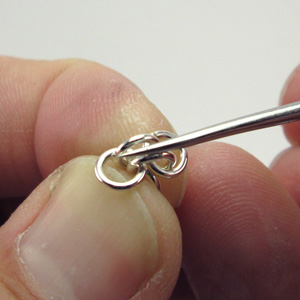
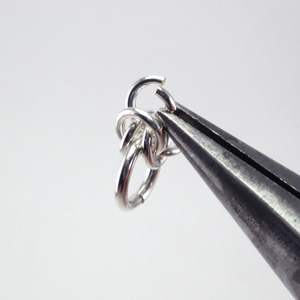
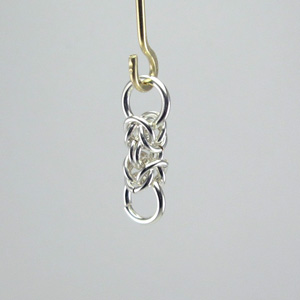
STEP 9: The Push
Push the awl into the chain. You are picking up the inside of rings [C] and [c] and pulling the up between [B] and [b].
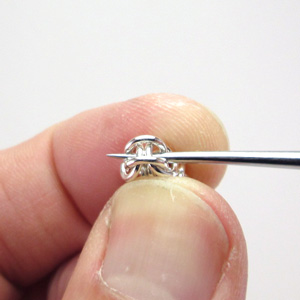
STEP 10: The Push - Review
Should look like this.
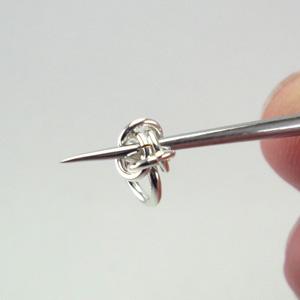
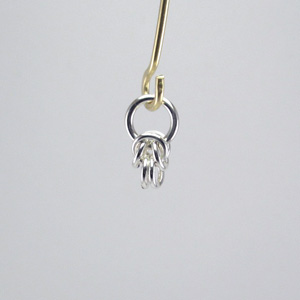
STEP 11: The Hold
Grasp the chain firmly. Remove the Awl, maintain a firm pressure. This will keep the chain from collapsing while you pickup and add your next set of jump rings.
STEP 12: Add New Ring
Open a new small jump ring and insert it in the space occupied by the awl.
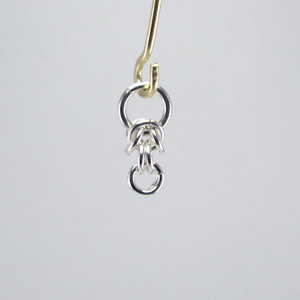
STEP 13: Close the Ring, Add a Second Ring
Close the added ring and add a new small ring beside it.
STEP 14: Half way There
The last two jump rings become the new A. (Review Step 1)
STEP 15: Add Two Rings
instructions
STEP 16: Add New Pair
Add two new rings to the end of the chain.
STEP 17: Grip, Flip, Divide and Hold
Grip and Flip the chain. Insert an Awl just as in Steps 6 thru 11.

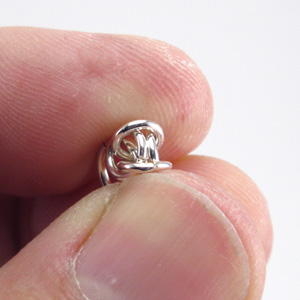
STEP 18: Insert new Large Jump Ring
Remove the Awl and Insert a new large jump ring in its place. Segment Complete!
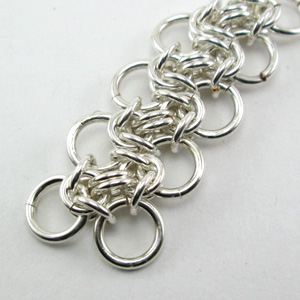
STEP 19: Make Segments
Repeat the steps to make several of these byzantine segments. A bracelet requires between 18 and 22 segments.
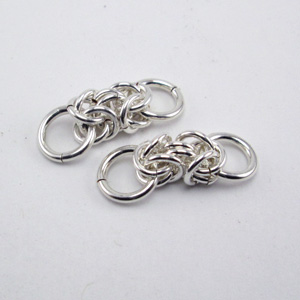
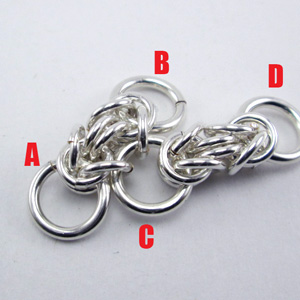
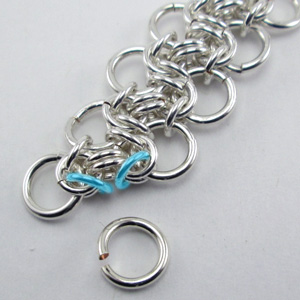
STEP 20: Link Segments
Open the large jump ring C at one end of the chain segment C - D. Insert the large ring thru the two jump rings (marked in blue) on the side of segment A - B.
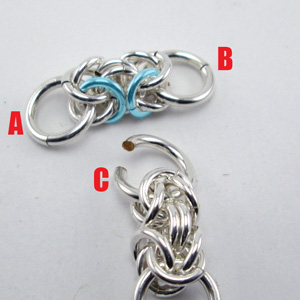
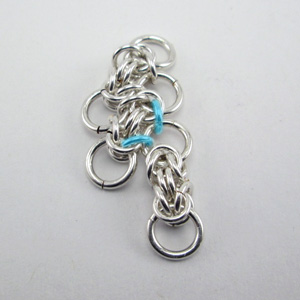
STEP 21: Looks like This.
Your chain should look like this.
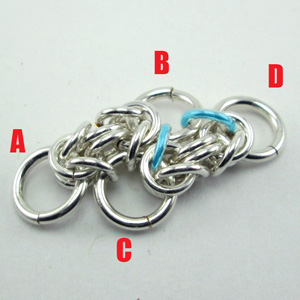
STEP 22: Link the other End
Open the Large jump ring B at the end of segment A - B. Attach it to the rings on the side of segment C - D.
STEP 23: Keep Adding Segments
Open the end of a new segment and attach it the the middle of the existing chain.
STEP 24: Connect the Other End
Complete the other connection end of the segment.
STEP 25: Balance the End
When you have completed the desired length of your chain, add a Large jump ring to each end.
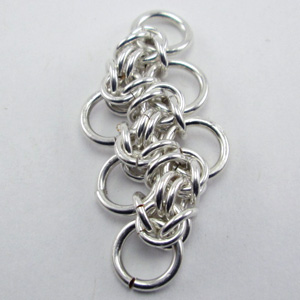
STEP 26: Both Ends should look like this.
Once you have the ends squared off, you can add a clasp.
STEP 27: Add a Clasp
Add a small jump ring and link the two large jump rings at the end. Using a second jump ring, attach your clasp. Repeat on each end.
