How to Make A Resin Pendant / Link
Preparation is the most important part of this project. Spend the time preparing the images and you will get a flawless image.
|
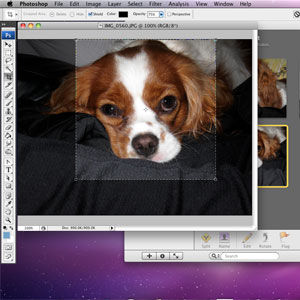
STEP 1: The Image Crop your photo to the approximate size of the pendent or link. Leaving a little extra border is recommended. It is easier to cut a little extra off the picture than have a gap between the photo and the frame. The paper used in the image is very important: Scrapbook Paper: Okay
|
 |
||
|
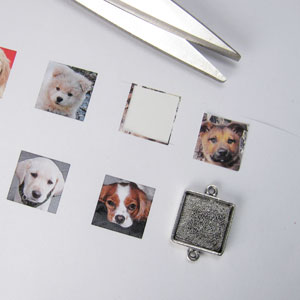
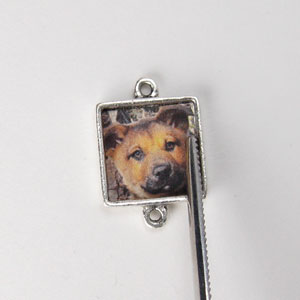
STEP 2: Cut to Size The image should fit inside of the borders of the frame. There should be a small amount of wiggle room. Do not force the image to fit inside. Continue to trim the picture until it will lay inside the frame. Be sure that the image makes full contact with the base of the frame to prevent air bubbles from getting trapped in the finish.
|
 |
||
|
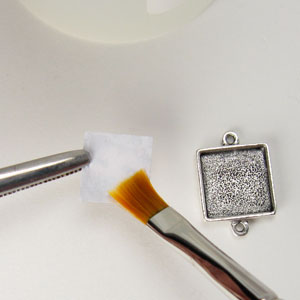
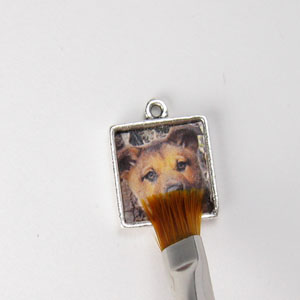
STEP 3: Coat Back of the Image with Sealant Coat the back and edges of your image with a thin coat of sealant. We recommend our Resin Guard sealant for preserving your image. Wet resin can be absorbed into the fibers of the paper which causes staining. White glue as an alternative product for sealing in this step.
|
 |
||
|
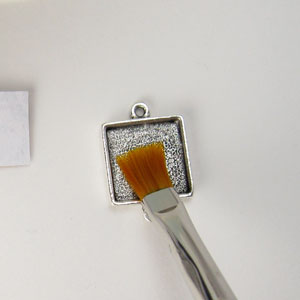
STEP 4: Glue to the Frame |
 |
||
|
STEP 5: Press into the Frame |
 |
||
|
STEP 6: Coat the front (option) If you are using a lab produced photograph (not from ink-jet printer) you may skip this step. The more porous the paper, the more important it is to put on a top coat of water based sealant (like our Resin Guard Sealant). It is best to add several coats, depending on the paper stock. Allow each coat dry between applications. Recommended # of coats: |
 |
||
|
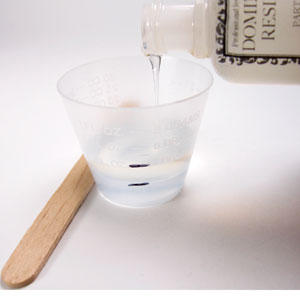
STEP 7: Measure the Resin Resin does not dry, it cures, and curing is chemical reaction. This chemistry lesson is to stress that the success of this project is all about measuring the resin and hardener components correctly. For best results average room temperature should be around 68˚-70˚F. and normal humidity. Letting the resin bottles sit in a hot water bath for 10 minutes will make it easier to pour and measure, and reduce the bubble created while mixing. For the resin to cure correctly, you should make each batch no less than 1/2 oz at a time. This will make approx. 10-15 1/2" pendants. Our Professional Resin product mixes 1 to 1 ratio by volume. On your measuring cup, mark 1/4 oz and 1/2 oz. using a marker. Pour in the resin first (marked A). It is thick like honey, take your time and hit the first mark. Pour the hardener (marked B), much thinner, to the second mark. |
 |
||
|
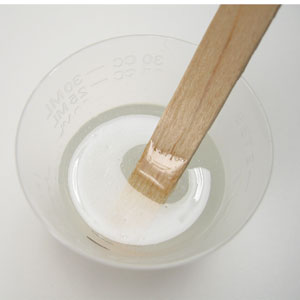
STEP 8: Stir Thoroughly |
 |
||
|
STEP 9: Transfer the resin Don't pour the resin. Use the stir stick to transfer it. Let it drip off the stir stick into the frame. Don't spread the resin mixture, it will spread out to the corners on its own. Fill the frame to the rim. Now add more. A few drops at a time and you can build the resin up above the frame to create the doming effect. |
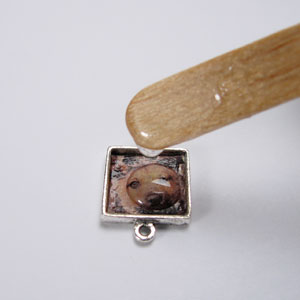 |
||
|
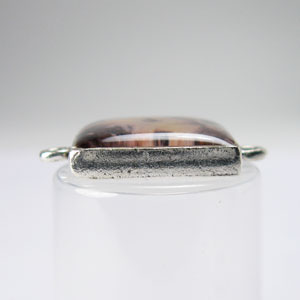
STEP 9a: How much Resin to Add If you the resin runs over the edge, don't worry. This product does not adhere to metal, after curing, any run off will peel off the metal casting. Note: Resin will stick to everything else, protect your work surface. |
 |
||
|
STEP 10: Let the Bubbles Rise |
 |
||
|
STEP 11: Professional tip - Bubbles |
 |
||
|
STEP 12: Cure the Resin At room temperature (68˙) your resin will cure in approx. 9 hours. High humidity and cold temperatures can prevent your resin from curing in the standard time. Fast Cure: Every 10-15 degree increase in temperature will reduce the curing by about one hour. Quick cure: 150˙F oven will cure in about 90 minutes. This method is not recommended for beginners. Many times you will miss the bubbles when you fast cure. |
|
||